17 Apr'25


Selling on multiple online platforms requires accurate tracking of the inventory level. It can get even more complicated when physical stores and warehouses are involved. Separate locations are also useful when you want to differentiate between the stock levels for online and physical stores.
Luckily, more and more online platforms are introducing several locations to track product stock. BigCommerce is not an exception; the platform supports adding product quantities from different locations.
In today’s article, we will highlight how Locations can be added to BigCommerce and how to use them in Salestio.
Add Locations to BigCommerce Products
Before adding the inventory levels to specific products, you should add the Locations to your store first. This will help you to keep the locations consistent across all products. To do so, go to Settings > Locations > Add new.
The form is really simple. You can add the name, address, contact details, and location details. What’s important for your online store, you can choose whether to show this location to your buyers.
If you sell on multiple marketplaces, you might want to add Locations like Amazon or eBay. It will help you manage stock on specific marketplaces.

Once the locations are set up, you can start adding the quantities to the products. You can edit the inventory inline for each location right from the Products View. To add more details for each location, open the Product page, scroll to the Inventory block, and add the necessary data. In addition to the Current Stock level, you can also add Low Stock, Safety Stock, and BPN.

If you do not store products in some locations, just skip adding the inventory levels to those products. The quantity will show up as 0 in this case.
Use Locations to send Quantity to Amazon, eBay, and Etsy
Once you have locations set up on your BigCommerce products, you can proceed to use them in Salestio. You can use Locations when you are new to Salestio and have just started using the app, as well as update the quantities for the products that you have already listed or connected with Salestio.
If you would like to know more about how to send the products to marketplaces, please check the following articles on how to do so for Amazon, eBay, and Etsy.
Configure Global profiles to use Locations
The Locations are configured through the Global profile in Salestio. To do so, go to Salestio > Profiles > Global profiles. You can create a new Global profile or edit the existing one.
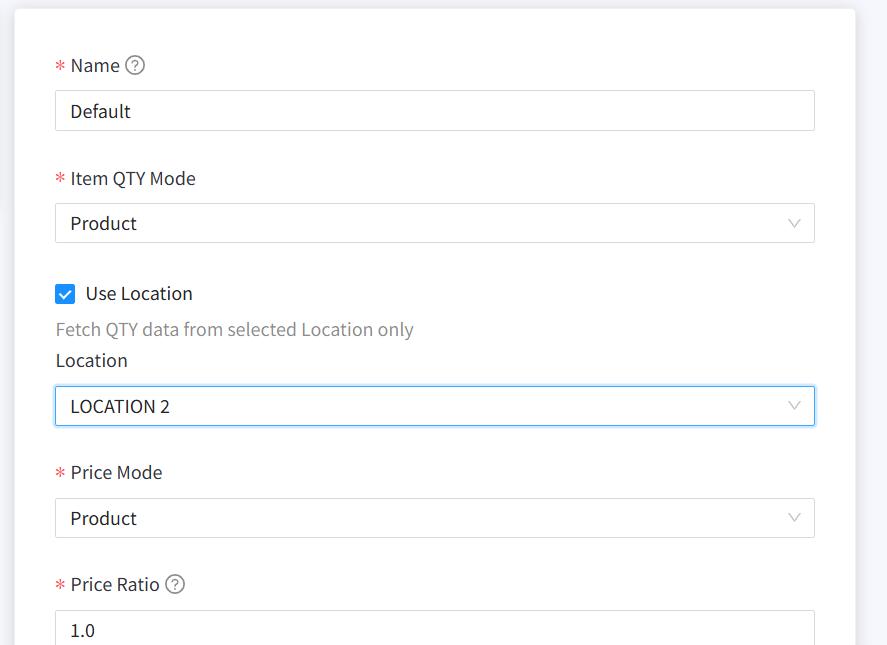
The Default Global profile is created when you install Salestio. It uses default values for Quantity and Price management. By default, Salestio calculates the stock from all Locations unless you specify one Location in the Global profile.
To specify the Location, put a checkmark in “Use Location” and choose the Location.
Would you like to check more tips on various quantity management rules in Salestio? Please check the article on how to manage quantities in Salestio.
Assign Global profile in the Selling List
To apply the Location rules that you added to the Global profile, you should assign the Global profile to the Selling List. To do so, go to Salestio > Selling Lists. Click Edit on the added Selling List or “Add Selling List” if you have not yet added one. Scroll down the page to the Profiles block. Select the Global profile from the drop-down list.

Scroll up to the page and click “Save Selling List”.
Update quantities for already listed products
Once the Selling List is created, the products will be sent to the marketplaces using the rules specified in the Global profile. However, if you have already sent the products to Amazon, eBay, and Etsy, and the products are Linked, you might want to apply new rules right away. To do so, select the Selling List and run the Update QTY (Amazon), Revise QTY (eBay), and Update QTY & Price (Etsy).

We hope this article helped you to understand using the Locations in BigCommerce and Salestio even better. If you still have any questions about this functionality or would like us to cover some specific topics in the future, reach out to us at support@salest.io.
Don’t forget to check our Salestio app for BigCommerce and Amazon, eBay, and Etsy on the BigCommerce App Store.