23 Jan'26


Shopify offers the option to manage the inventory in multiple Locations, such as warehouses or retail stores. Making use of the Location features is helpful if you want to track the inventories separately, lower fulfillment costs, and better navigate in multi-channel sales.
Salestio offers multiple tools to integrate your Shopify Locations with online marketplaces. In this article, we will explore the options and relevant tips for tuning the app to your specific Location configuration.
Product export and sync
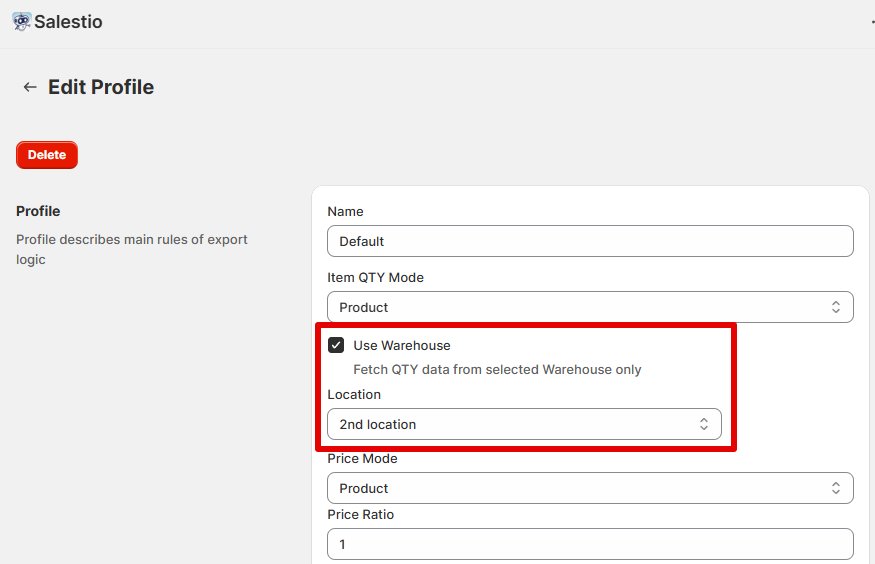
When sending new products to the marketplace or updating existing listings, Salestio uses the combined Shopify inventory as the stock number by default. To change this, edit your Global Profile settings in Salestio > Profiles. Enable the “Use Warehouse” option and select one of the Shopify Locations below.
When publishing new products, Salestio will use the selected Location for the stock number. For existing linked products, manually run a quantity update from the Selling List right away to apply the changes.
Every Selling List in Salestio can use one Global Profile at a time. You can configure multiple Selling Lists with their own Global Profiles to specify a different Location for each. This is useful if you want to separate the inventories for different marketplaces (for example, a Europe-based warehouse and a separate one for the Australian market).
See the related guide: How to Manage Listing Quantities with Salestio
Fulfilling orders
By default, Salestio lets Shopify decide the fulfillment Location automatically. You can specify your own in Salestio > Settings. Location can be specified at three levels: all orders, account level, and order type (Amazon only).
- Adjusting Locations for all orders can be done in Settings > General Settings. This will apply to all connected accounts.

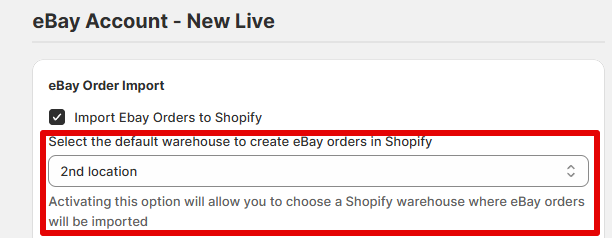
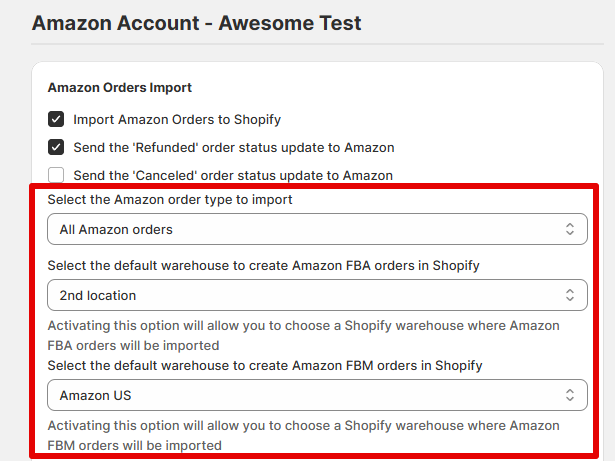
- To set a separate warehouse for a specific marketplace account, pick the account in the sidebar and edit the order importing section:
- For Amazon, you can select different Locations to fulfill FBA and FBM orders. This option becomes available when both kinds of orders are enabled for importing.
Change Location for individual orders in Shopify
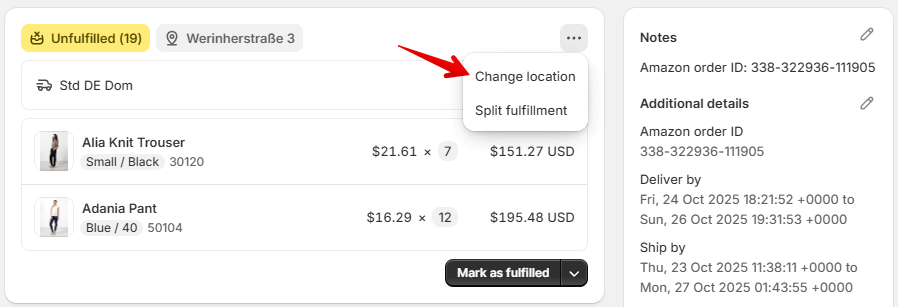
After Salestio imports marketplace orders to the store, they become like other Shopify orders. At this point, you can edit the Location manually. Open the Shopify order and click the “Change location” option from the 3-dot menu:
Order sync: possible errors and troubleshooting
Below are the errors that might appear when Salestio imports the orders into Shopify. These messages can come up depending on your Location setup in Shopify and Salestio. To check if there is an error with a specific order, open it in Salestio > Orders and scroll down to the timeline.
You can enable email notifications for order errors to stay up to date. Enable the option in Salestio > Settings (Email Notifications section).
Unable to reserve inventory
The error below appears when there is not enough stock in Shopify or in the selected location. As the first step, check if Shopify has enough stock and add more if necessary.
Line_items Unable to reserve inventoryIn some cases, the error might appear even if the Location has sufficient inventory. There are 2 possible reasons for this message:
- The selected Location in Salestio > Settings does not have enough items to fulfill the order.
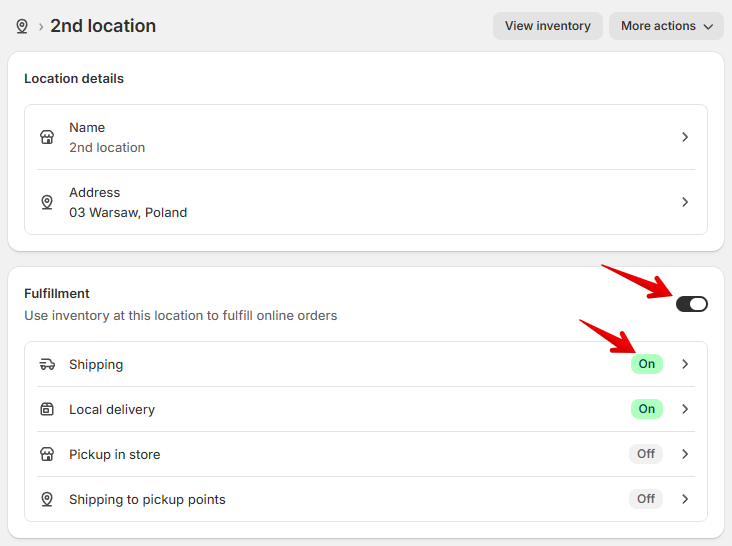
- The selected Location does not have the option “Use inventory at this location to fulfill online orders” enabled.
To make sure that Salestio can use your Shopify Location, check if the fulfillment is enabled in the Shopify store settings, along with the Shipping option:
Be mindful about enabling certain Locations, as their stock will become available on your Shopify storefront. In addition, Shopify can automatically assign a different Location to an order if your Location of choice does not have enough stock.
An option to avoid the “Unable to reserve inventory” error is to enable the “Continue selling when out of stock” setting on the items on the Shopify product page.
Be careful when using this option to avoid overselling
See the full guide about everything related to order import: Processing Amazon, eBay, and Etsy orders in Salestio
Unable to claim inventory
Unable to claim inventoryThis error can appear in two situations:
- The needed stock is split between multiple Shopify Locations.
- The items are reserved by another Shopify order.
To resolve this error, adjust the stock numbers in Shopify to make sure that there is enough in a single Location.
Configure the item synchronization settings with specific Shopify Locations to prevent errors like this. Make sure that the synchronization Location in the Global Profile matches the fulfillment Location from Salestio settings, so overselling does not happen.
Salestio offers a variety of tools to adjust your marketplace integrations and align them with Shopify Locations. Check out the app on the Shopify App Store to start a Free 30-Day Trial.