06 Mar'26


Salestio helps eBay sellers to manage the marketplace inventory simultaneously with Shopify. If you have an active eBay inventory, Salestio has a simple way to link it up with your Shopify store. In this article, we will share the steps to link the products and explain the related features.
The steps below assume that the seller account already has some listings published on eBay. For a guide to send new products to eBay, check out the post below:
Exporting Shopify Products to eBay Marketplace with Salestio
To connect the items between platforms, the products must have matching variants and matching SKUs (Shopify SKU must be the same as eBay SKU for each product/variant).
- Sync the items during onboarding
- Sync items from the Inventory page
- Update the linked items
- Check the Synchronization Report
Sync the items during onboarding
If you are new to Salestio, the app will walk you through the starting steps.
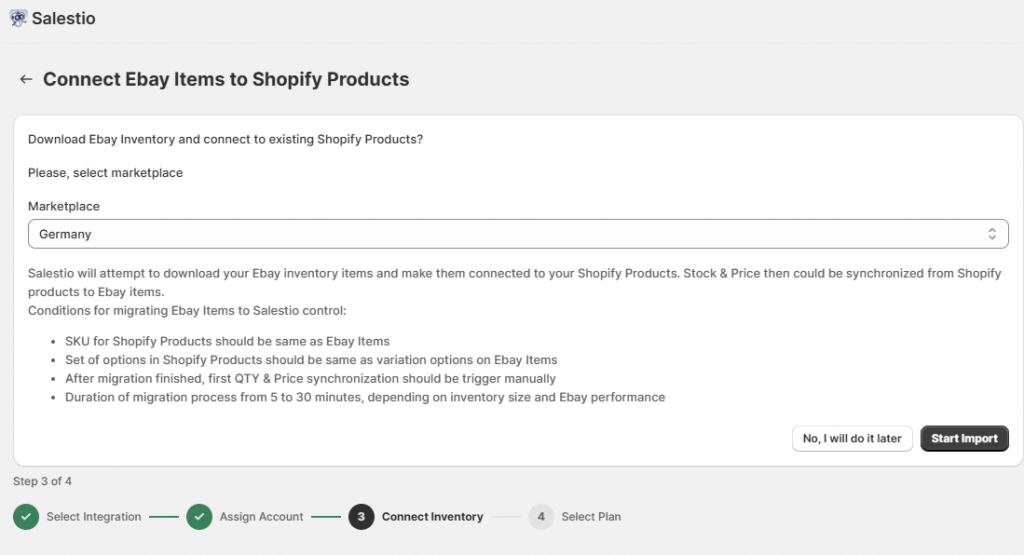
When setting up, select “List & sync Shopify products on marketplace” or “Both – full integration” and add your eBay account:
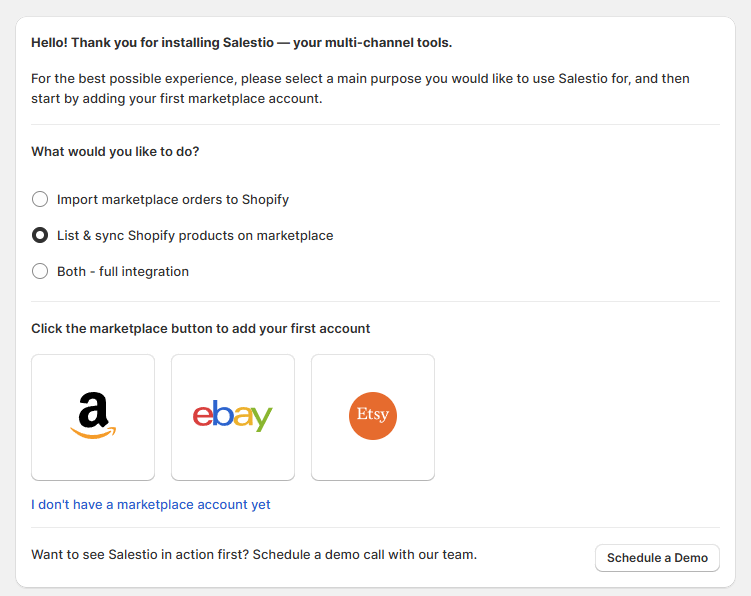
After adding the account, select the eBay marketplace and start the import. Salestio will automatically fetch the eBay product list and link matching items. You can find the results later in a Selling List that will be created automatically.
Sync items from the Inventory page
If you skipped the syncing from onboarding or want to customize your settings, check the steps below. We will detail every part that goes into linking the products.
To follow the next steps, make sure to connect your eBay account in Salestio > Accounts tab.
Create a Selling List
Adding a Selling List is an optional step that can help organize the products inside the app before they are connected. Creating the Selling List manually before connecting products can be useful for a few reasons:
- Customizing the rules for quantity and price synchronization. Default Salestio settings use the current Shopify price and quantity. Check the guides below to learn more about setting specific rules:
Custom Pricing Rules for Ebay and Amazon Listings
Manage Listing Quantities with Salestio - To have the option of connecting existing listings with Shopify and publishing new products to eBay. For example, add all desired items to a Selling List, link the existing products, and run the “Send to eBay” action for the rest of the items.
- Having different product groups in a separate list can make it easier to view and manage the products.
If you skip creating a Selling List at the start, Salestio will automatically create a “Migrated…” Selling List when syncing products.
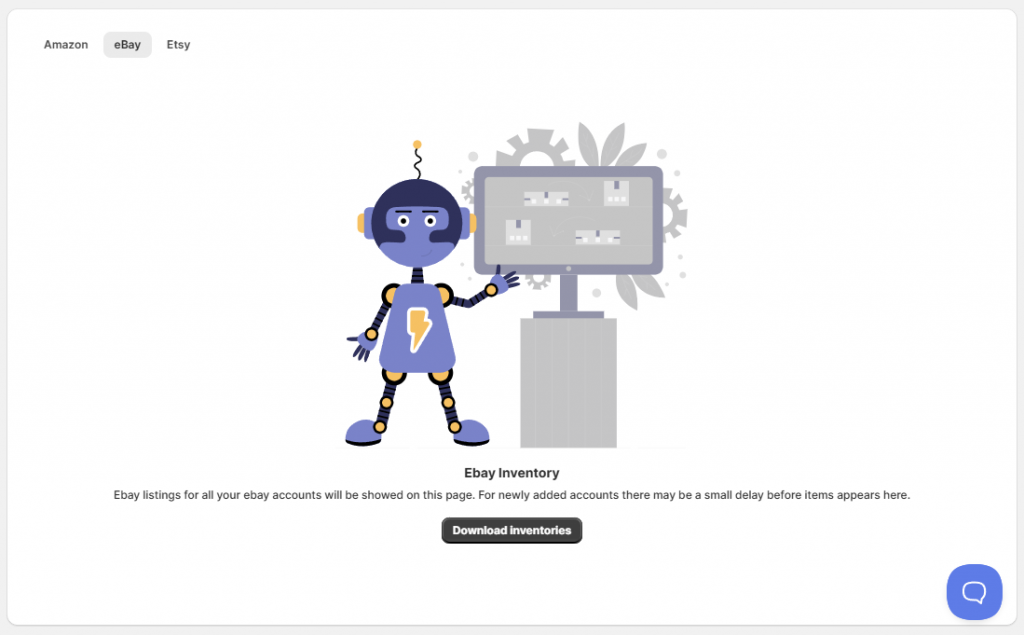
Download the inventory list from eBay
Retrieve the eBay listings on the account to start the linking process. Go to Salestio > Inventory tab and click “Download inventories” to get started. When multiple eBay accounts are connected, they will appear as selectable options. Select the target account and click “Download”.
Depending on the eBay product count, it may take 30 to 60 minutes to display all of the products in Salestio.
Connect the items and review the results
Salestio uses SKUs to find item pairs between eBay and Shopify. Before proceeding, make sure that the products have matching SKUs across the platforms. In case of a mismatch, you can adjust the Shopify SKUs to match eBay and continue with the next steps.
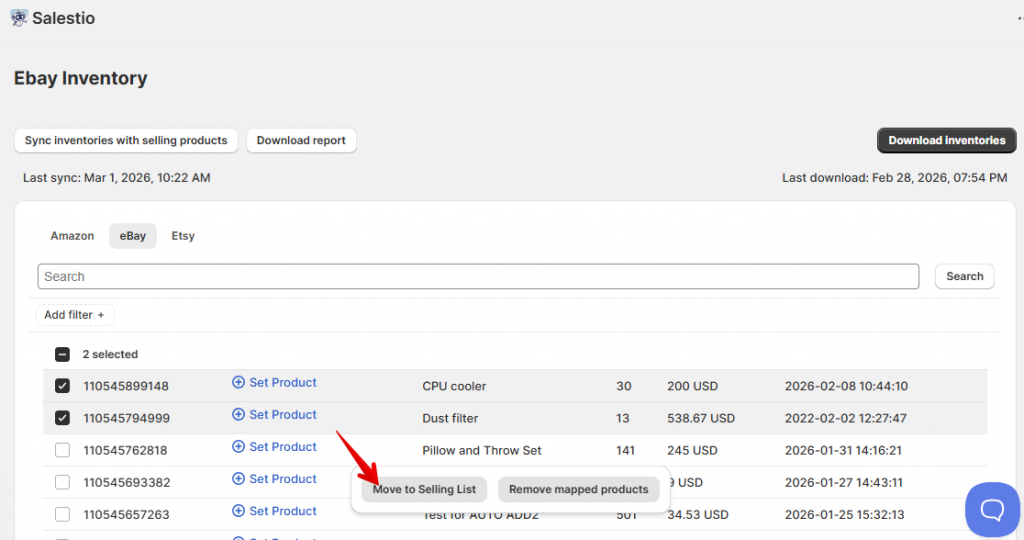
To connect the items, click the “Sync inventories with selling products” button in the Inventory tab. Select the target eBay account and start the sync.
When linking the items through this action, Salestio will also automatically update the quantity after the items are connected.
As another option, you can link individual items. Select the target items in the list and click the “Move to Selling List” button. Select the Selling List, and Salestio will create a connection.
Using the “Move to Selling List” action is possible only for Selling Lists in Product Mode. If you are using Collection Mode, run the “Sync inventories…” action instead.
See the results in the Selling Lists tab. If you created some Selling Lists beforehand, the items will remain there, but the status will change to “Linked”. The Linked status indicates that the connection is established, and Shopify stock and prices will be synced to eBay.
For items that haven’t been added to a Selling List beforehand, Salestio will create an automatic one called “Default for account_name”. You can find the linked items inside.
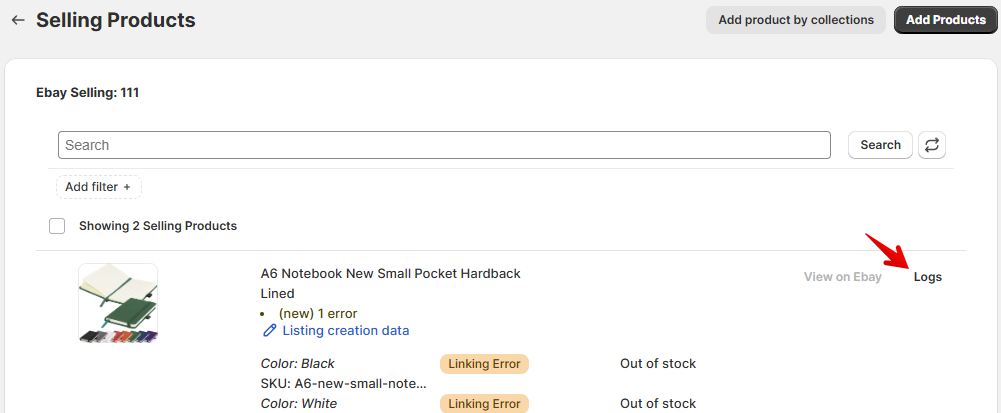
Update the linked items
Salestio will sync the “Linked” items in the background when stock or price changes in Shopify. If you would like to push the stock and/or price numbers from Shopify to eBay right away, run this action manually from the Selling Lists tab. Select the Selling List (or individual items inside) and run one of the update actions (Revise QTY, Revise Price, Revise Quick).
In some cases, item updates may result in an error status. Check the logs to find out what went wrong:
The following message can appear when Shopify variations don’t match the eBay ones (for example, if the Shopify product has an extra variant):
Missing name in the variation specifics or variation specifics setTo resolve this, Salestio can update the eBay variations to match Shopify. Follow the steps from the section below to configure the app accordingly and update the item.
Keep in mind that this resolution only applies if the variant structure does not change. For example, if the product had a variation in Size and we added a Color theme on top, the update would not work. To change the variation structure, we suggest stopping the item on the marketplace and listing it again through Salestio.
Linked items can be updated with new product details (titles, images, descriptions, variations) based on the Shopify product page. The steps below are useful only if you want to publish more items or edit existing product details.
Making product adjustments or publishing new listings on eBay requires a Creation Profile. Set it up in Salestio > Profiles tab, and then enable product creation in Selling List settings or the current eBay Profile.
Learn more about the Creation Profile configuration in the eBay export guide
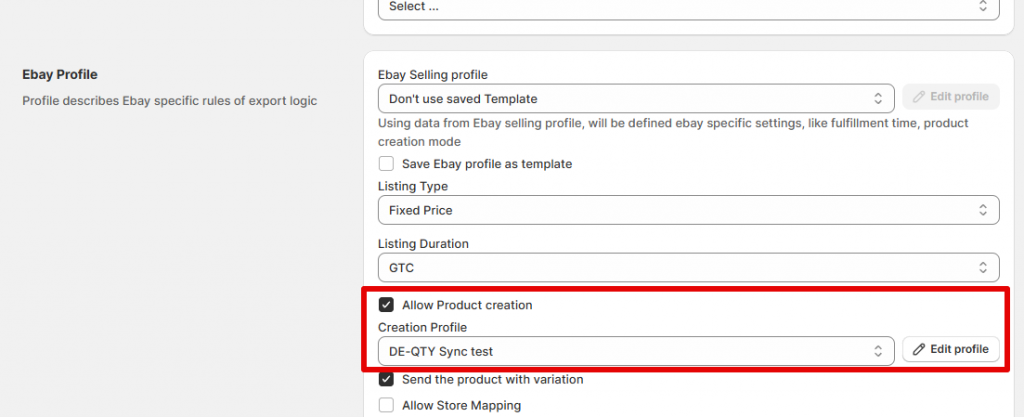
After updating the settings, select the items in the Selling List and run the Full Revise action. This will update the eBay listings using the information from the Shopify page and the Creation Profile.
Check the Synchronization Report
Salestio features tools to scan the marketplace inventory for products that might have been missed during synchronization. This can help catch the possible issues in case some items have non-matching SKUs or remain not connected for other reasons.
- First of all, go to the Inventory tab in Salestio and click “Download inventories” to get the updated inventory list.
- Select the marketplace account and enable the checkbox to remove existing items from the list. This will ensure that only the current inventory appears in the report. Click “Download” and give the app a few minutes to compose the list of marketplace items.
- After the marketplace items appear in the list, you can download the report file for a selected account using the button at the top.
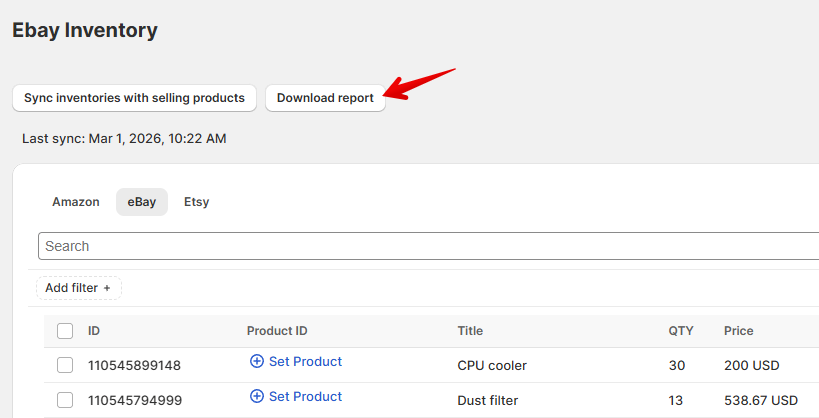
The CSV file can be opened with a text editor. We suggest using a spreadsheet app for faster navigation.
Full guide: Use Synchronization Report in Salestio
Salestio assists the sellers in integrating an already running eBay store into the Shopify inventory management. By following the steps in this article, you can sync the two platforms in a few simple steps. Don’t have Salestio yet? Find the app on the Shopify App Store and start a Free 30-Day Trial.