17 Apr'26


Salestio offers ways to automate listing Shopify items on Amazon. Based on the Shopify inventory, the app can create and sync the Amazon listings to the shop.
In this article, we will walk you through sending Shopify items to Amazon using the Selling Products view, creating new Amazon listings, and addressing potential issues.
- Connect a Seller Central account
- Add products to Salestio
- Set up the Listing Data
- Edit the Sync Rules and enable autolisting
- Send products and review results
- Bulk actions with the product list
Connect a Seller Central account
To perform any operations on Amazon, you should connect your account to Salestio first. This can be done during the onboarding stage. Make sure that you have a Professional Seller account to post listings. In case you skipped the onboarding step, add the account separately in Salestio > Accounts tab > Add account. Select the Amazon region/marketplaces and check the Salestio policies, then save the settings.
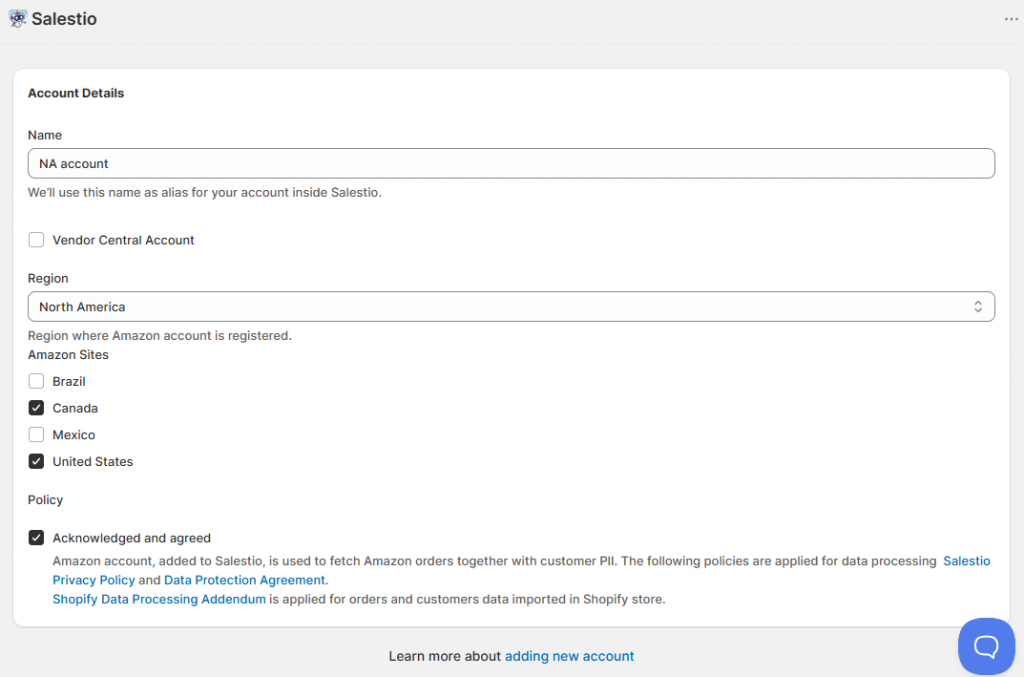
In the next step, you will be redirected to your Seller (Vendor) Central account to confirm Salestio permissions. Review and confirm. After this, the Seller Central account is ready to go. You can confirm its status by checking the badge in the Accounts tab.
Add products to Salestio
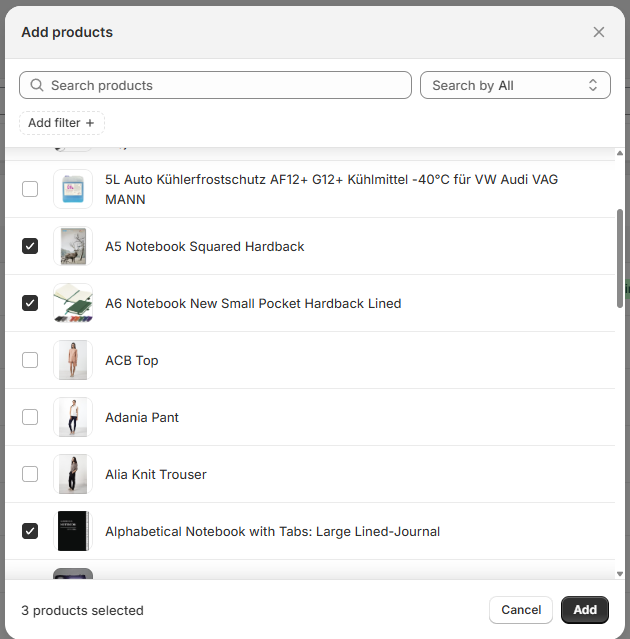
Next, we should select the products to put under Salestio’s management in the Selling Lists tab. If you have multiple Amazon accounts, they will be available in the tab dropdown here. Select the target account and click “Add Products” at the top.
Select the target Amazon marketplaces for the product. If you are selling the same items on multiple marketplaces, there are options:
- Pick only one marketplace in Salestio. To push the items to the other marketplaces, make them international using the built-in tools available in your Amazon account. See our guide for international Amazon listings for more details.
With this setup, any updates from Salestio will affect all marketplaces. - Pick multiple marketplaces. This way, Salestio will send the information directly to the multiple Amazon marketplaces. The upside of this approach is the option to tune each marketplace separately and set individual rules for pricing or a dedicated local warehouse.
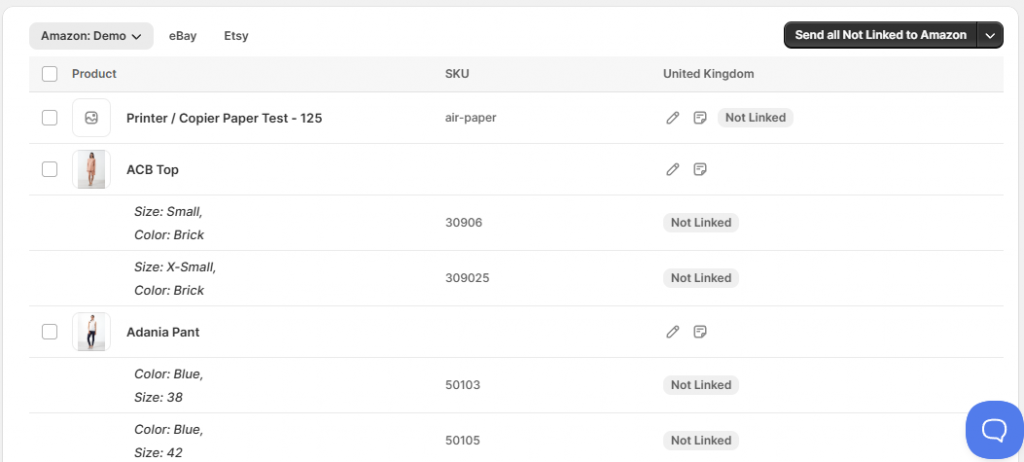
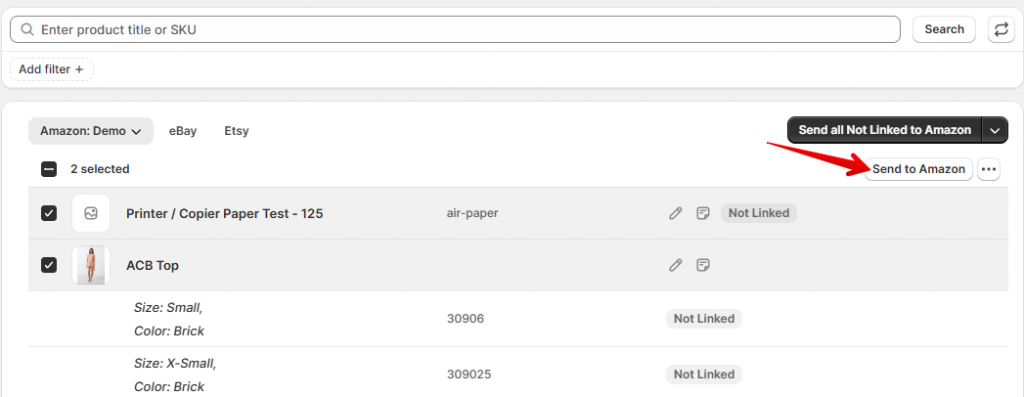
In the next step, select the Shopify items to add to your Salestio product pool. Don’t worry about selecting every single one for now. You can add more products at any time. New items will appear in the list with a Not Linked status:
Ensure the correct product identifiers
Amazon is based on a unified catalog of products, with different sellers joining or leaving shared product pages. Salestio will need a barcode, like EAN or UPC, to correctly identify your Shopify product and place it on the correct Amazon page.
Related: SKUs and Barcodes: Understanding Product Identifiers
In the next steps, we should configure the contents of the future listings. Salestio has two ways of adding product details to the items:
- Listing Data can be added to a single product. Settings from here can be converted to a Syncing Rule later.
- Syncing Rules can save some time when configuring large product collections. Salestio can apply settings from a matching Syncing Rule automatically, which is handy when sending products at scale.
Keep reading to find out more about both methods.
Set up the Listing Data
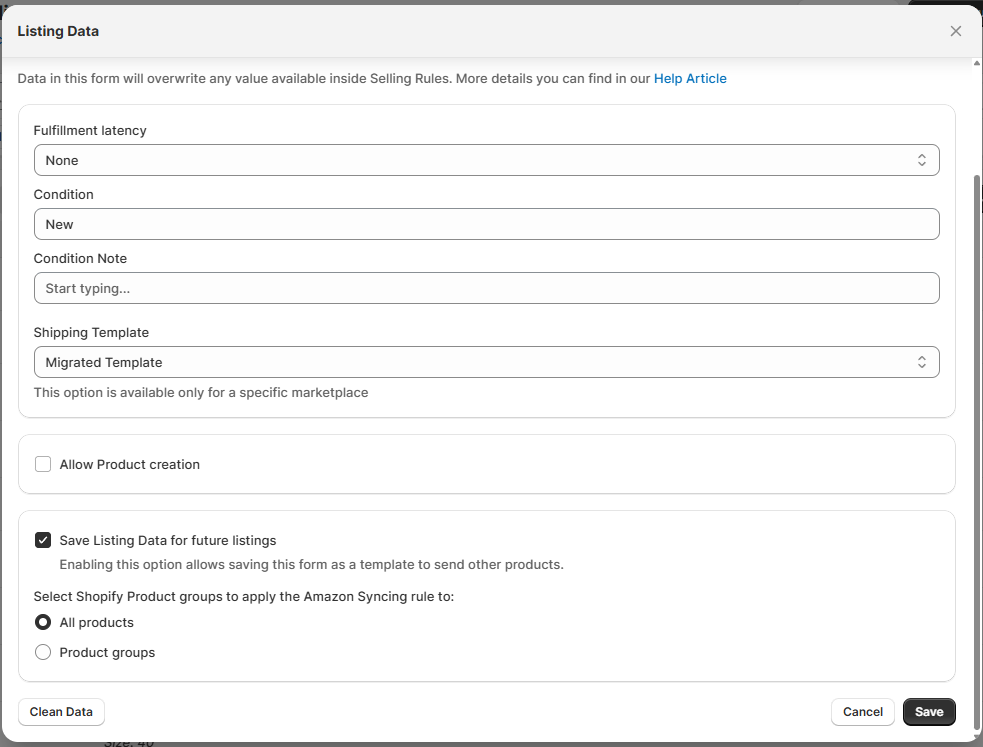
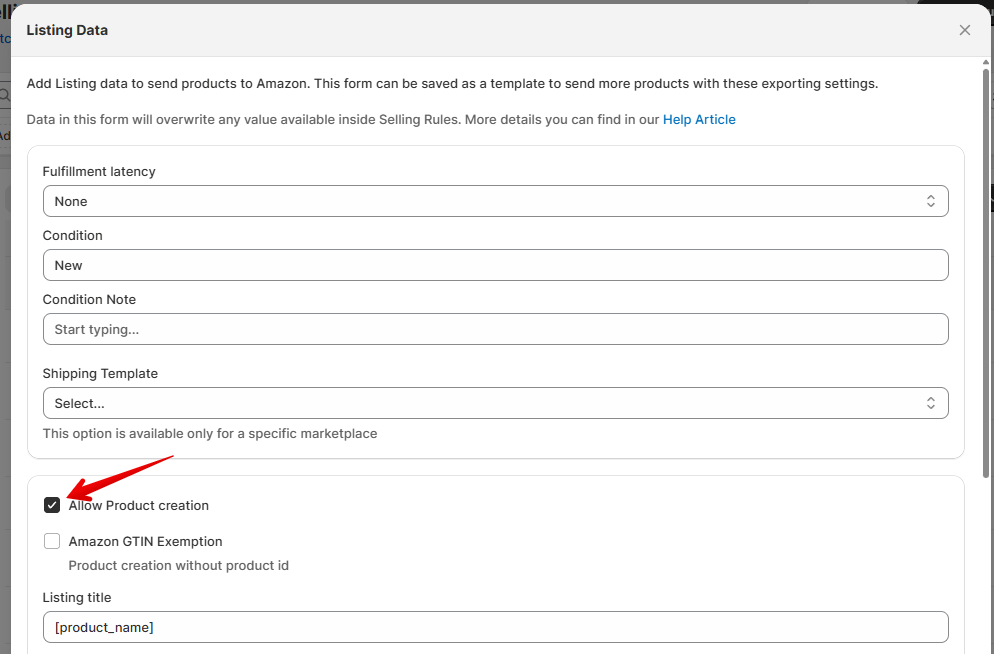
To set up the listing information for an individual product, click the pencil icon under the target marketplace. This page has a few key sections for adding information to the listings.
The general section has options for fulfillment latency, condition, condition note, and shipping template.
Below, you can enable product creation. This section is needed only when publishing products that are not in the Amazon catalog yet (items that don’t have an ASIN). If you are not sure, skip this section for now.
After saving the Listing Data for one product, you can send it right away or convert it into a Syncing Rule (“Save Listing Data for future listings” option). When this is enabled, all the settings above will be converted into an Amazon Syncing Rule, which you can edit later (more on this in the next section). You can save the preset for all listings or only specific kinds (based on a matching Shopify product type, collection, or category).
Edit the Sync Rules and enable autolisting
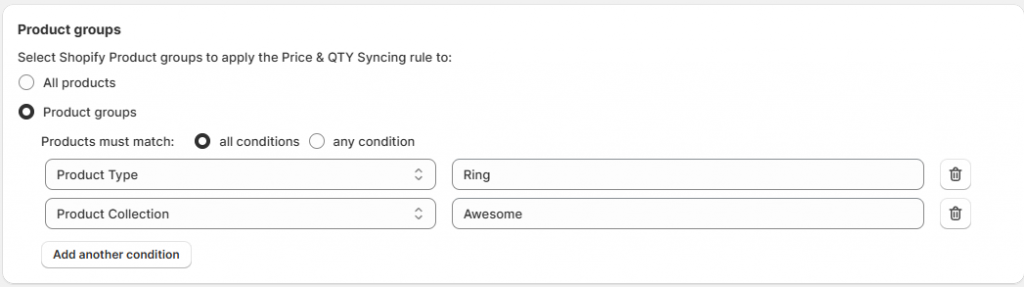
Syncing Rules are global rules for product listings. Salestio applies the matching rule based on the Shopify Collection, Category, or Product Type condition.
Click Syncing Rules at the top of the page to check the listing settings. Each rule has a match condition in the Product groups section. Salestio will automatically apply the saved rules based on this match:
Salestio applies the following priority for the Syncing rules:
- Listing Data added to the individual product (if any)
- Syncing Rule with a filter match
- Syncing Rule configured for all products
There are a few different rules relevant to Amazon products:
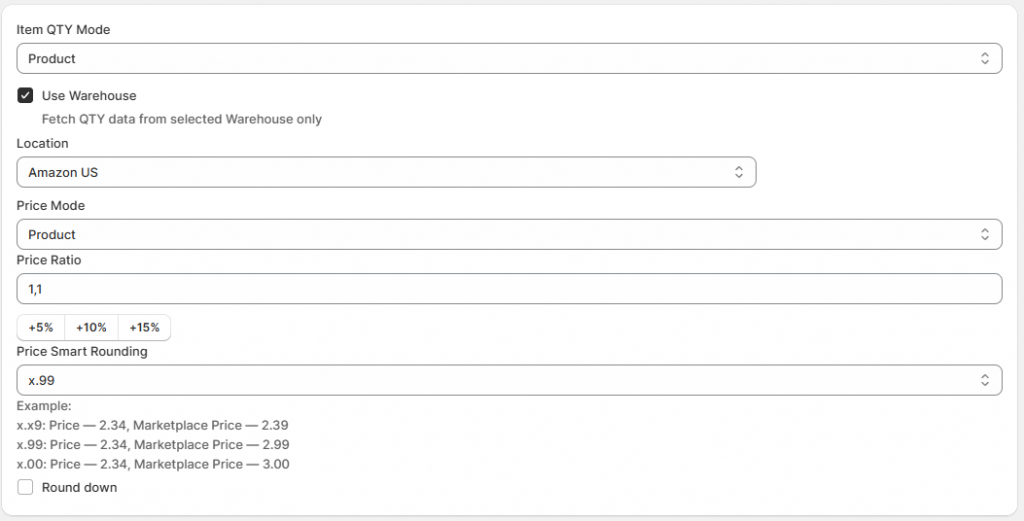
Price & QTY Syncing Rule
Salestio comes with a default Price & QTY rule for all products. The default preset sends the exact prices and quantities as they appear on the Shopify product page.
Set alternative modes for product syncing, pick a specific Shopify warehouse, or enable price rounding. Learn more about available options for customizing prices and quantities in the respective blog articles. Saved Price & QTY rules can be applied to any account or marketplace.
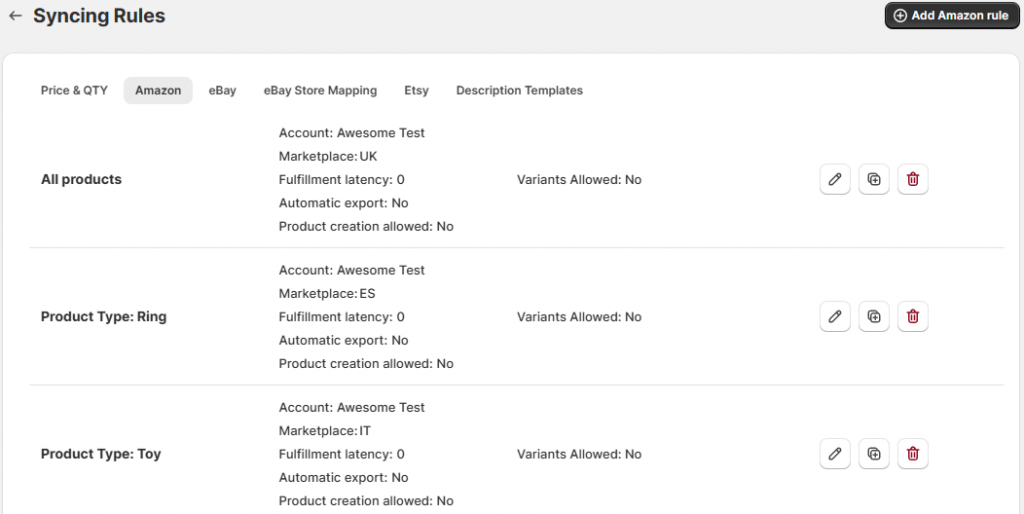
Amazon Syncing Rule
If you saved any Listing Data presets earlier, they will show up in this tab. Here, you can edit or add more Listing Data templates for your Seller Central items. Each template is saved for a specific account and marketplace. If you are selling on multiple marketplaces, make sure to add a Syncing Rule for each one or set up individual Listing Data for the rest of the products without a template.
Automatic listing can be enabled in this profile. When enabled, Salestio will automatically any matching products to Amazon.
In the Amazon Syncing Rule, set the fulfillment latency, product condition, and shipping template. Optionally, add a condition note. Below, enable product creation if you need to create new products in the Amazon catalog. With enabled product creation, set the target Amazon category and add product specifics below.
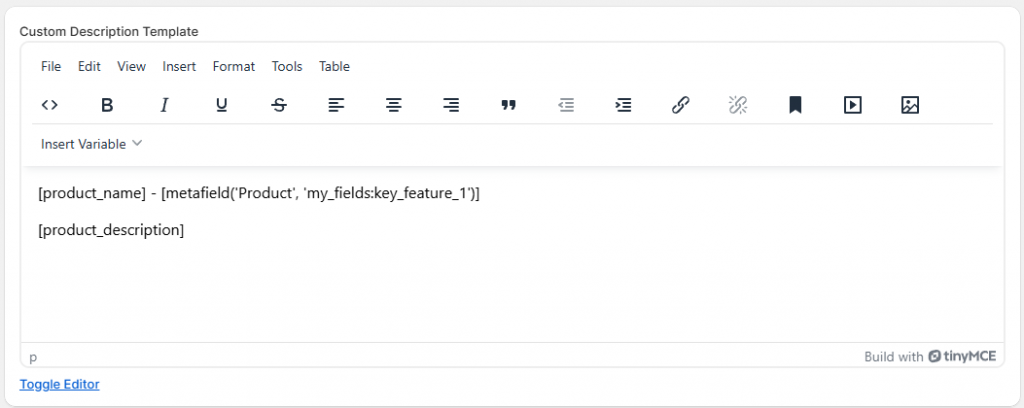
Description Templates
In Description Templates, set up a preset to compose a description for the marketplace listings. Use the editor to add custom text or product information from Shopify, including Metafields.
Description Templates are applied only when creating new Amazon listings (with product creation enabled).
Send products and review results
After all the Syncing Rules and Listing Data are configured, send the items to the marketplace. There are two ways to publish the products:
- Send product one by one: select the items in the list and click the “Send to Amazon” button at the top of the list
- Send in bulk: click “Send all Not Linked to Amazon” to publish all possible items in the Not Linked status
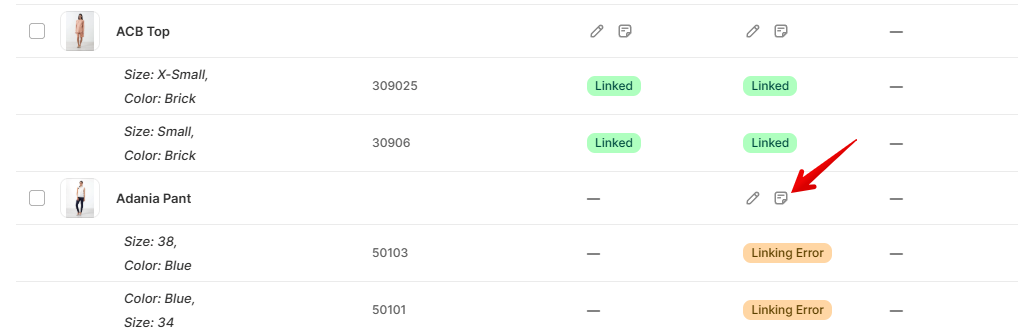
Check back in a few minutes to see the results. Salestio will keep syncing the “Linked” items as the Shopify products update.
Some items might show up with a Linking Error status. Check the logs to find out why:
Selling Variant with sku 'awesome-sku' action was completed with an error. externally_assigned_product_identifier: 'External Product ID' is required but missing.This error means that Amazon did not receive any barcodes for the item. As mentioned earlier, each item can be identified by a GTIN barcode like EAN/UPC, or by an ASIN. Check if the identifier is correctly added (barcode on the Shopify product page, ASIN in the Selling List) and try sending the item again.
Selling Variant with sku 'awesome-sku' action was completed with an error. merchant_suggested_asin: 'Merchant Suggested ASIN' is required but missing.This error means that your product does not exist in the Amazon catalog yet. It can also mean a typo in your barcode, so it is worth double-checking if the item is on Amazon.
To create new items, Amazon requires additional information, and you can provide this with Salestio. To fix this error, edit your Listing Data (or Amazon Syncing Rule) and enable product creation. Add the Amazon category and item specifics, then save the updated profile and send the item again.
See the help article below to find the exact steps for different kinds of errors:
Common errors and how to fix them
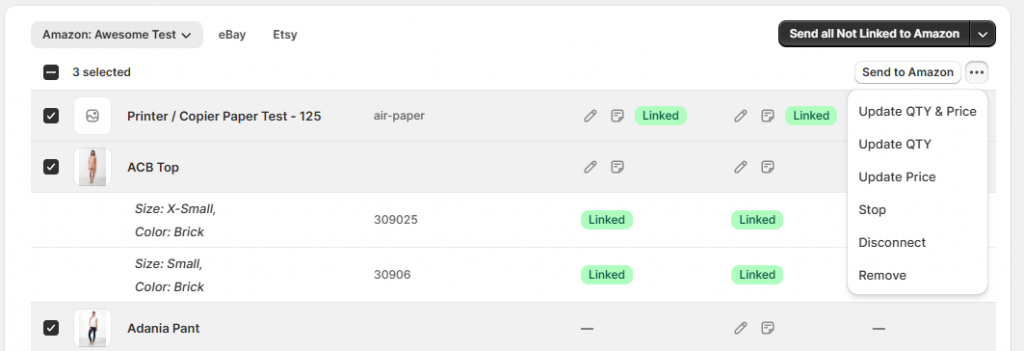
Bulk actions with the product list
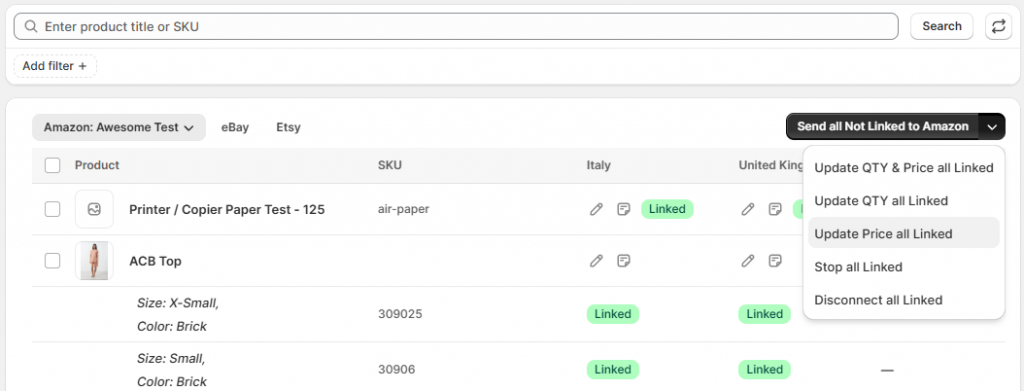
Salestio automatically updates the Linked products in your list based on the configured Price & QTY Syncing Rule. If you want to update the products manually, check the bulk actions at the top of the page. You might want to do a manual update after making adjustments to your Price & QTY Rule to apply them right away.
Alternatively, you can select multiple items in the list using the checkboxes. Click the three dots at the top to access bulk actions only for the selected products:
Check the alternative way to send and manage the products through Selling Lists, which allows sorting the items into different groups. See the full guide here: Send Shopify products to Amazon
Sync prices and stock, fulfill Amazon orders, and connect other marketplaces like Etsy and eBay, all in one place. Find Salestio on the Shopify App Store and get a Free 14-day trial.